All posts by admin

Turkey Bowl

TB 2016 Logo
Every Thanksgiving our group of old high school buddies gets together and plays mud football. It started out as some good dirty fun playing tackle football on one of a handful of fields in Loomis. After the broken wrist incident of 2005, we switched to flag-football (as shown in the x-ray pictures in the 2006 invite). A few years older, we now live in the suburbs, but we continue our tradition and round up as many of the usual suspects for a game of Turkey Day football.

Here is a collection of the website and video invitations from 2002-2006. They started off as just basic image slideshows, then added in some music in 2004,  and a full blown video in 2005. The image quality started off pretty poor, because half of the pictures are crappy digital pictures of my 35mm prints, and the rest were probably my crappy digital camera in action! At some point we had enough significant others with cameras taking pictures, so the picture quality improved in the later years.

On that note- if you have any pictures from the old Turkey Bowl games, email me and I can share them with everyone.

2002: Turkey Bowl V

2003: Turkey Bowl VI

2004: Turkey Bowl VII (turn up your sound- and ignore the typo…)

2005: Turkey Bowl VIII

(if the video doesn’t embed, just watch it here)

2006: Turkey Bowl IX

This year marks the 19th consecutive year of playing mud football on Thanksgiving morning. It feels like we should definitely do something special for the 20th edition next year, but maybe we can organize something fun for Turkey Bowl XIX. Let me know if you have any thoughts and we can make something happen.

-BZ

The Budget Biotech

The bench beaver is always watching you

I have been toying with the idea of starting my own biotech startup in my garage, and want to determine the lowest amount of upfront investment it would take to set up a functional molecular biology lab.

OK, a little background to help the discussion. Straight out of grad school I took a job with a startup biotech developing strains for fermentation of high value small molecules. When I arrived the lab had a few tables and some basic equipment, but being that an electrical engineer did the initial purchasing it wasn’t quite ready for much biochemistry. So my first job was to outfit the lab with the necessary equipment and consumables to get things moving. I quickly realized how expensive laboratory equipment and research reagents were without the generous academic discounts I had grown accustomed to. We pieced together a mixture of new and used equipment, took advantage of lab startup promotional deals, and ultimately assembled a fully functional molecular biology lab on a pretty modest budget.

Taking what I learned from setting up my first biotech lab, I know I can do better. How much better? I think it should be possible to assemble a functional molecular biology lab for under $1,000. But wait you say- that is just enough to buy a decent set of pipetters- how could you set up an entire lab for that?

Precisely. That is the heart of the challenge. To create a budget-minded biotech that is functional, but doesn’t cost an arm and a leg. As I wrote up in a previous article, “biotech shouldn’t be so dang expensive!”

I think it all depends on how you define the core functionality. To me, the minimum functionality needed is to clone genes and express proteins. I am focusing on the steps from source DNA to expressed recombinant protein. So basically from PCR through cloning in E.coli, to expression of proteins.

Things I am not including in the $1,000: Analytical (in my case HPLC or LCMS), basic infrastructure like tables, stools, computer, etc., and little things like surge protectors or extension cords. And I may take the liberty of culturing my own competent cells to cut down on that cost. Vector backbone will be an open-source design to get around IP conflicts and keep things cheap. We’ll see how far we can stretch $1,000 and go from there.

I am looking mainly at functional but well-loved equipment on ebay and craigslist, and even some homemade or hacked projects capable of carrying out the job at hand. EBay has some amazing deals. So does Amazon (I usually avoid Thermo subsidiaries as much as I avoid Wally World!). And if you are willing to do some soldering, coding, and 3D printing, you can make just about anything in the lab. I acknowledge that reliability will undoubtedly be less than brand new equipment still on warranty, but of the three-legged stool of quality, cost, and time- this exercise is focused primarily on cost.

Here is my initial list of equipment, projected cost, and notes on procurement. Let me know what you think, where you think I can cut the cost down, or if there are any glaring errors in my choices or logic. I plan to revise and post updates to my budget biotech quest, so hopefully this is only the beginning!

-BZ

EQUIPMENT
Item Cost Notes
pcr – thermal cycler $200.00 used… Ebay. Or ghetto fab water bath and servo setup?
gel rig $53.00 kit from iorodeo.com
light box $80.00 mini kit from iorodeo.com or build myself
pipetters $100.00 2 pipettes at 50 each. P20 and P200 to start
water baths $12.99 crock pots with arduino thermostat (DS18B20 and SSR)
-20C freezer / fridge $50.00 total budget – cheap chest – or used on CL
incubator $50.00 Cooler/chest freezer with hairdryer/heatgun heater and extra fan? Or foam insulation box.
autoclave $83.99 pressure cooker- presto on amazon. Ikea?
centrifuge $80.00 used Brinkman on Ebay
flame for plate work $60.00 Ebay flame/regulator kit
Micro scale $25.00 amazon
microwave? $20.00 craigslist
gel power supply $15.00 homebuilt (budget molecular biology power supply)
rotary shaker $140.00 used old NewBrunswick on ebay
pH meter $20.00 Amazon or Ebay
TOTAL EQUIPMENT: $989.98
CONSUMABLES
Item Cost Notes
tips $10.00 Ebay- bulk tips – need upfront tip box
weigh boats $10.00 or papers
DNA stain $68.00 SYBR Safe – cheaper alternatives with blue LED illuminator?
gel buffer TAE homemade
DNA polymerase $39.00 mastermind from geneandcell.com
dNTPs included in mastermind mix
DNA buffer TAE homemade
gel extraction kit NA45 paper? Simple protocol? Kit…
1kb ladder $89.00 geneandcell.com
load dye bromophenol blue
comp cells homemade – but lack of -80 will affect competency
Total Consumables: $216.00
Total Combined: $1,205.98 over budget already! And chemicals not even included yet!

Why Zippypickle?

People have asked me, what’s behind the name Zippypickle? Well, my name is Brandon Zipp, and my friends just call me Zipp. During my freshman year in high school we were at track practice, and I still remember the interaction well. While standing in line waiting to do the long jump, a classmate that I didn’t know asked my name. I said Zipp, and he pondered for a second. He then responded, “I’m going to call you Zippypickle.” I’m not sure where he came up with it, but it was unique and fun. When it came time to register for my first hotmail email address, I tried a few combinations with Brandon and Zipp, but the basic configurations were already taken. So I tried Zippypickle, and poof- it has been my go-to nickname/username since then.

At one point I thought I would start a brewery or a business called Zippypickle, and even sketched out a logo for it. What could be more fitting than a cowboy riding a bucking pickle?

Zippypickle Cowboy

I recall someone saying that a cowboy riding a pickle would be too phallic. Hence the molecule as the logo for the Zippypickle blog…

-BZ

Zippypickle Mini Molecule

Builds I’ll get to eventually

So I’m swamped with work right now, but I have a number of projects that I want to write up and share. For now I’ll just show some of my old pictures and give a quick overview, and hopefully it motivates me to finish everything. Hopefully…

Mini bioreactor controller
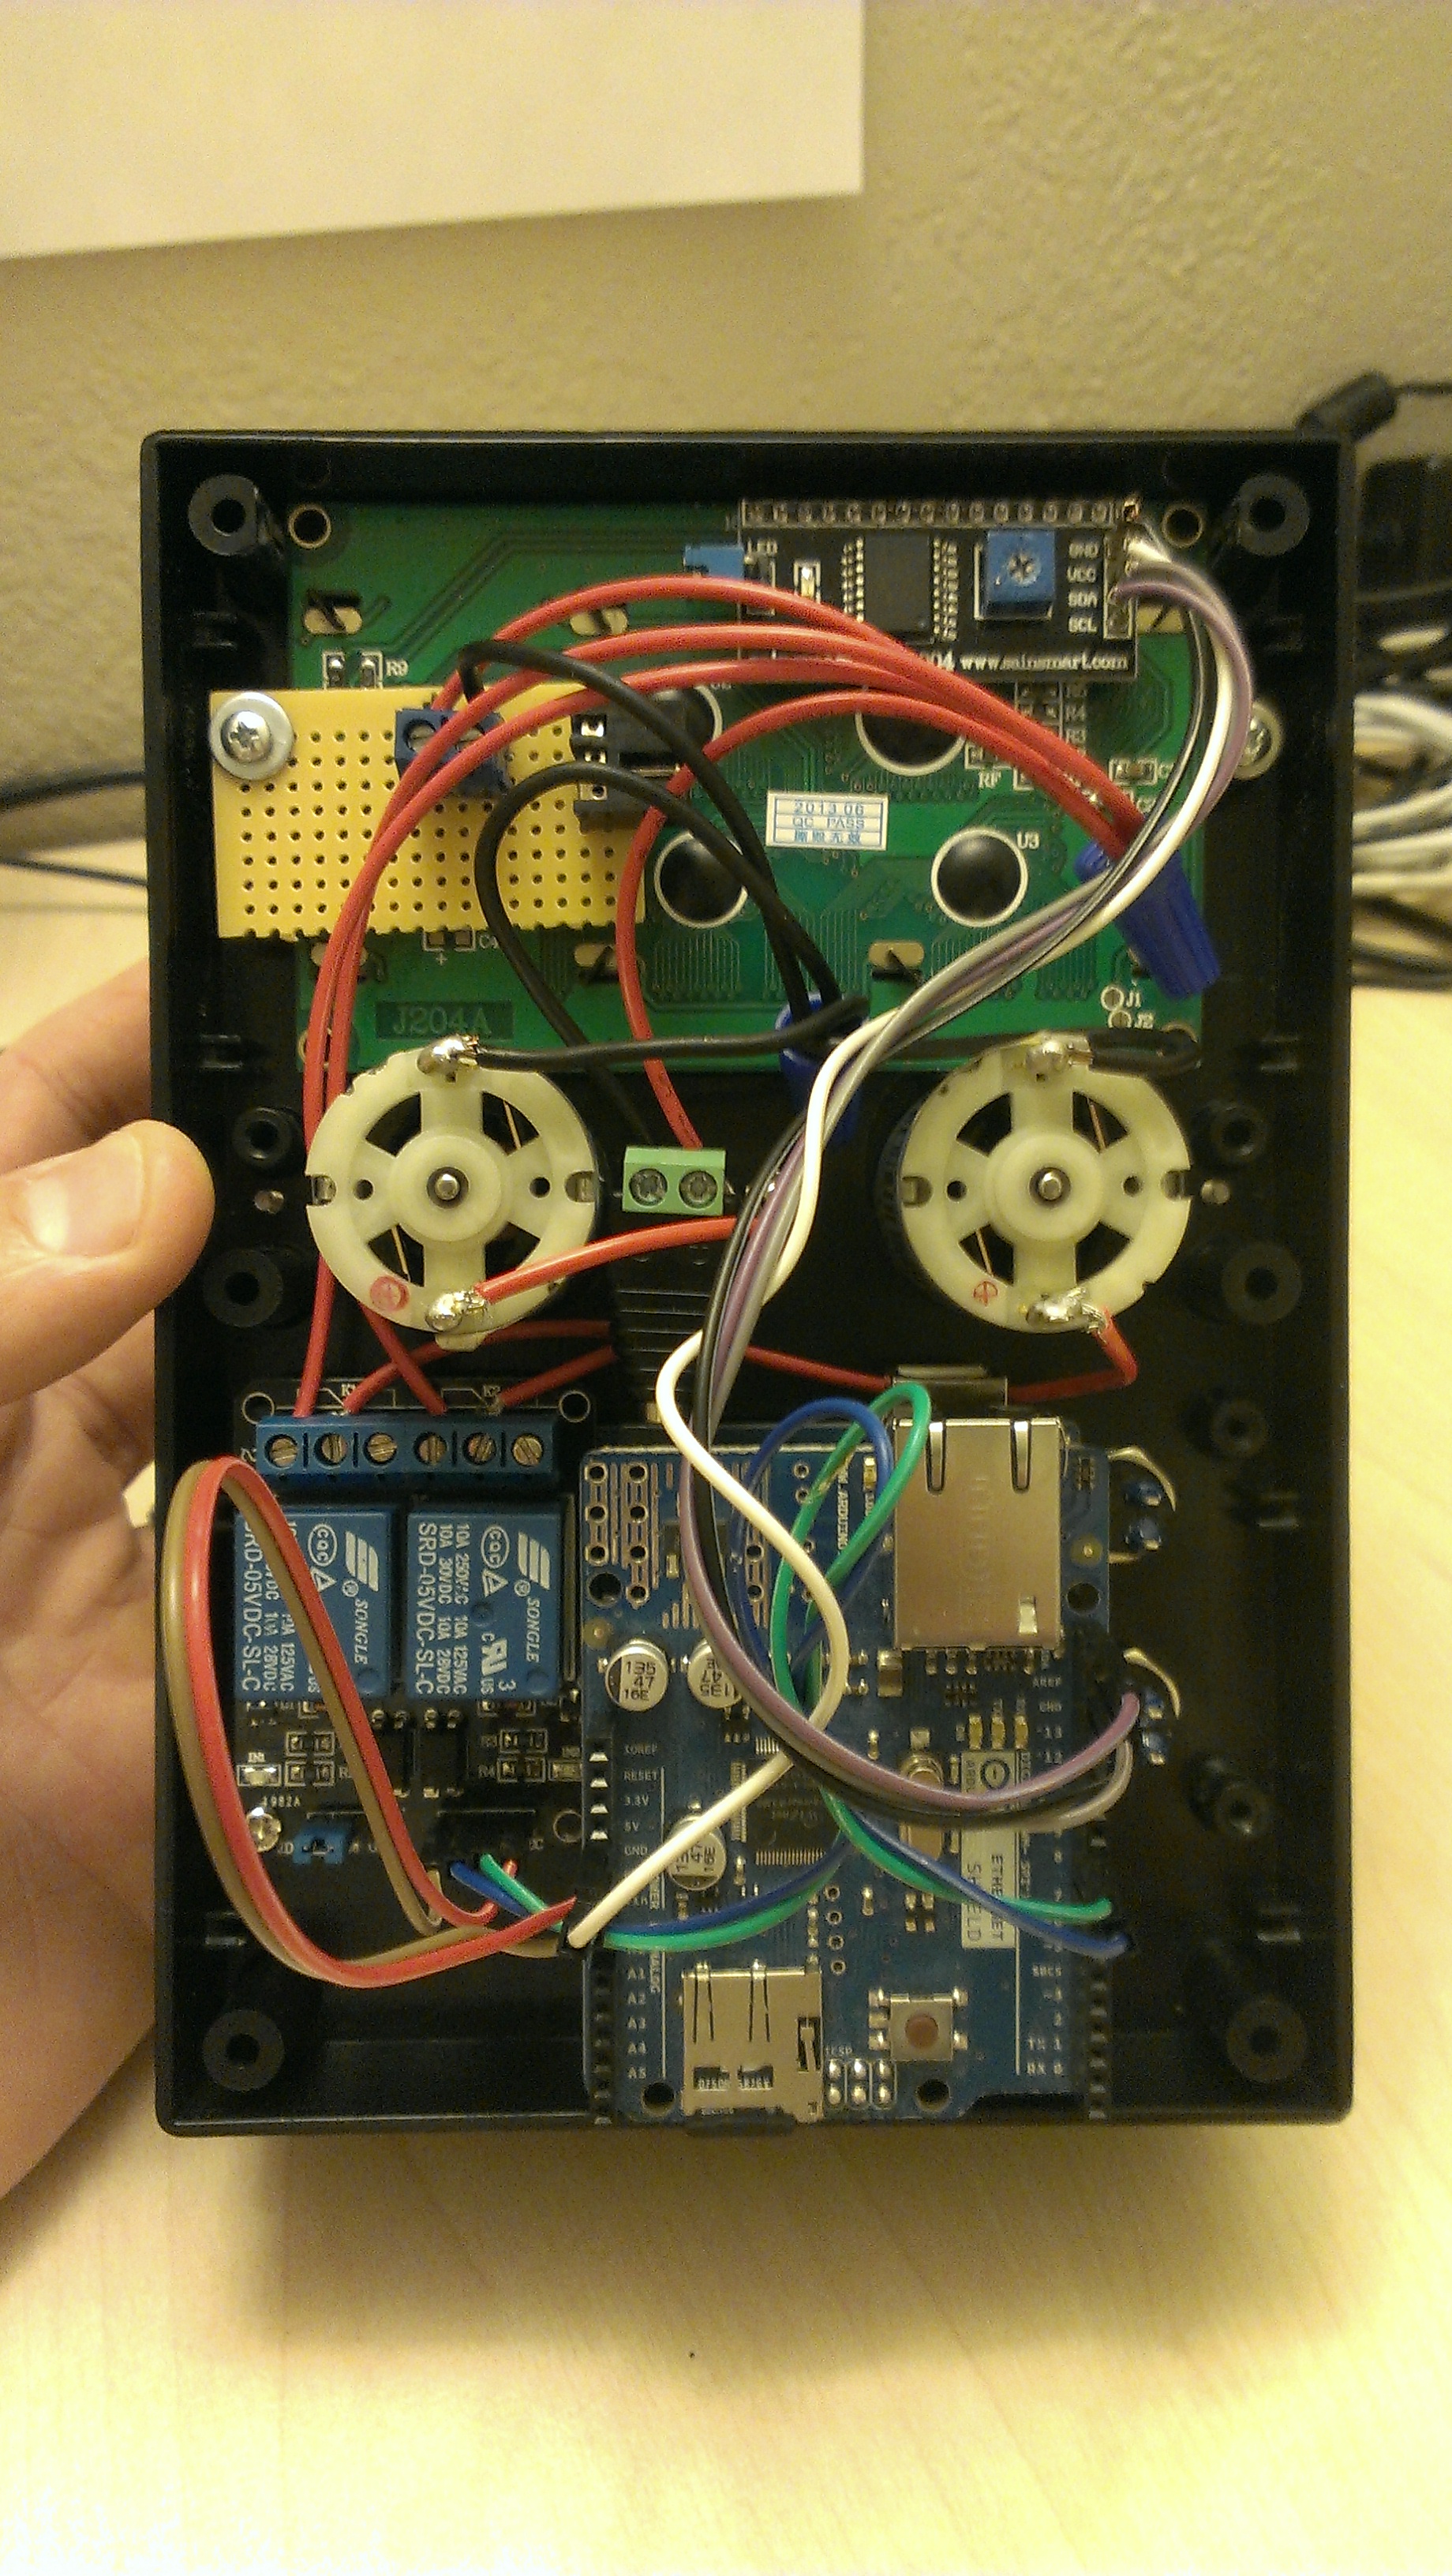
Arduino controlled peristaltic pumps via relays with 20x4 LCD
I tried making a mini bioreactor unit to support smaller spinflasks with feeding and to operate the mini flowcell spectrophotometer, and got it to work decently well. There were two peristaltic pumps from Adafruit, a 20×4 LCD to show the time and culture status info, and some buttons for manual advance of the pumps.

Temp display and datalogger
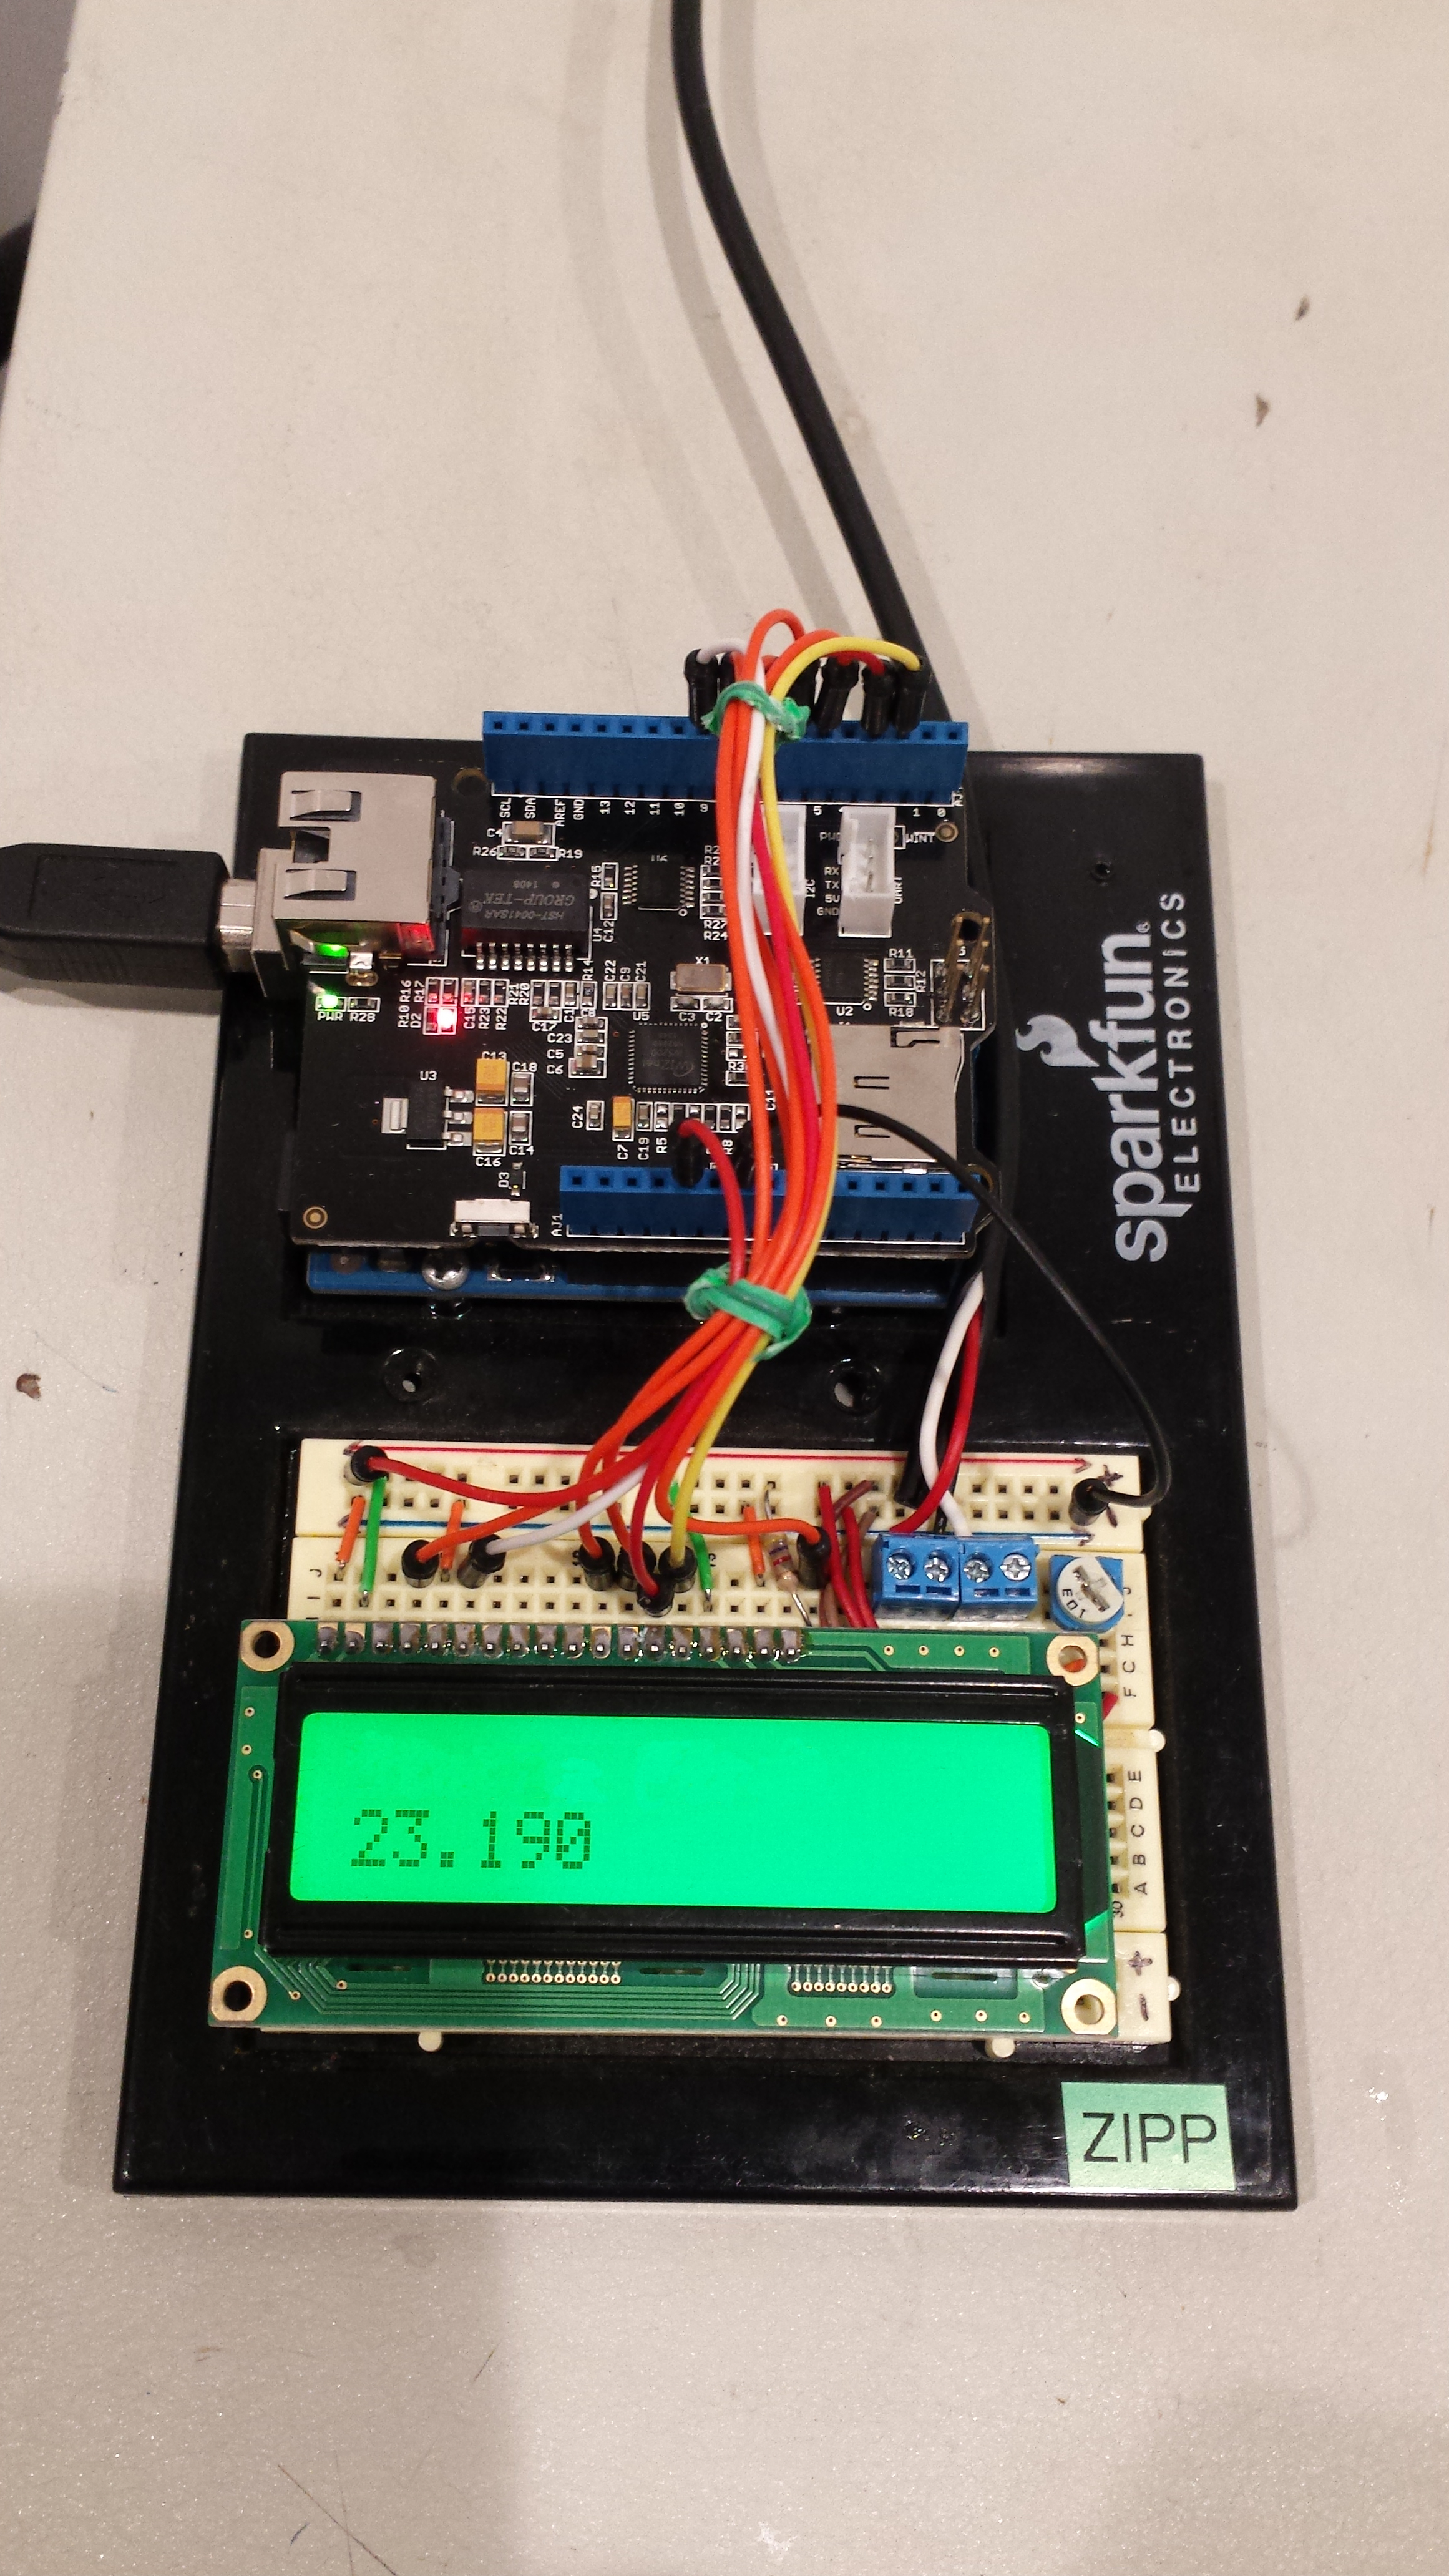
High temperature display and SD datalogger
To monitor vessel temperature while running processes, I used a DS18B20 digital temp sensor with my perma/proto Uno. I now use Arduino pro mini’s for my embedded projects, but back then I didn’t know what was up.

Millisecond light timer switch
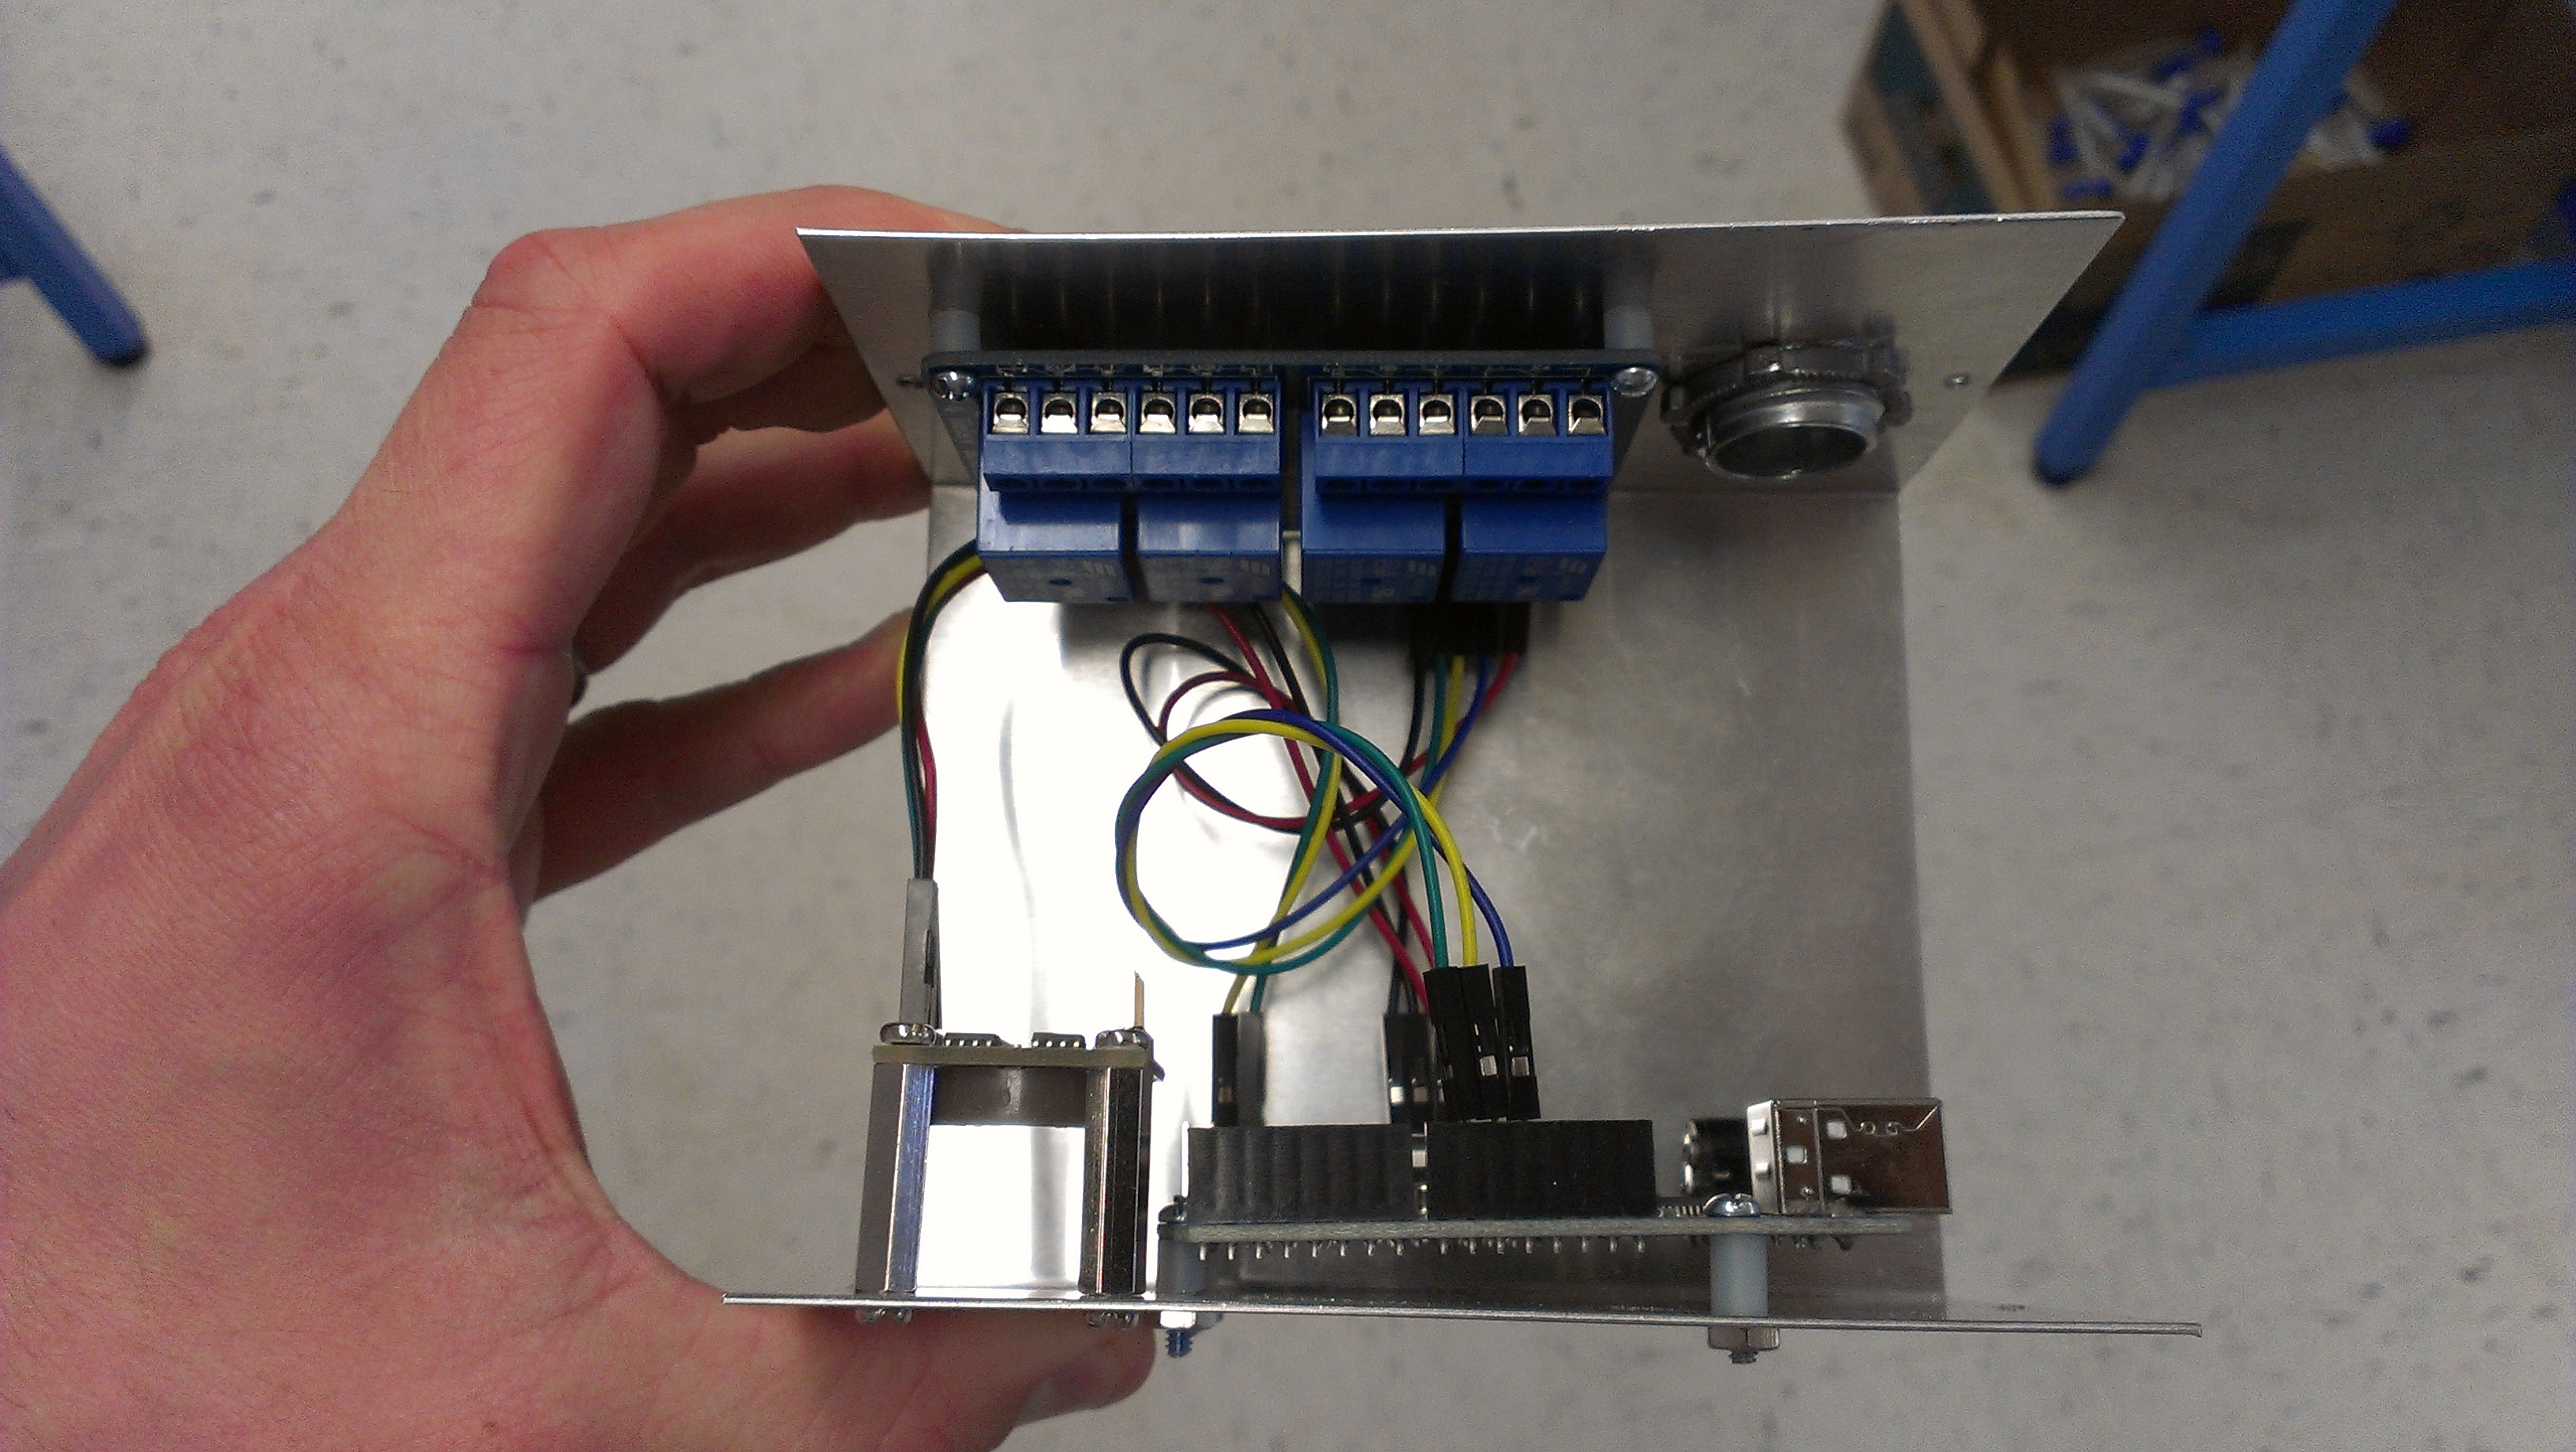
arduino, ds1307 RTC module, and relays to switch things quickly
I did a project that required turning a light on for one second every 24 hours. Conventional analog light timers give you half hour resolution, and some digital light timers can get down to the minute. We needed seconds, so I turned to an arduino with a DS1307 real time clock module to keep time, and relays to handle the heavy lifting.

Light sensor and datalogger
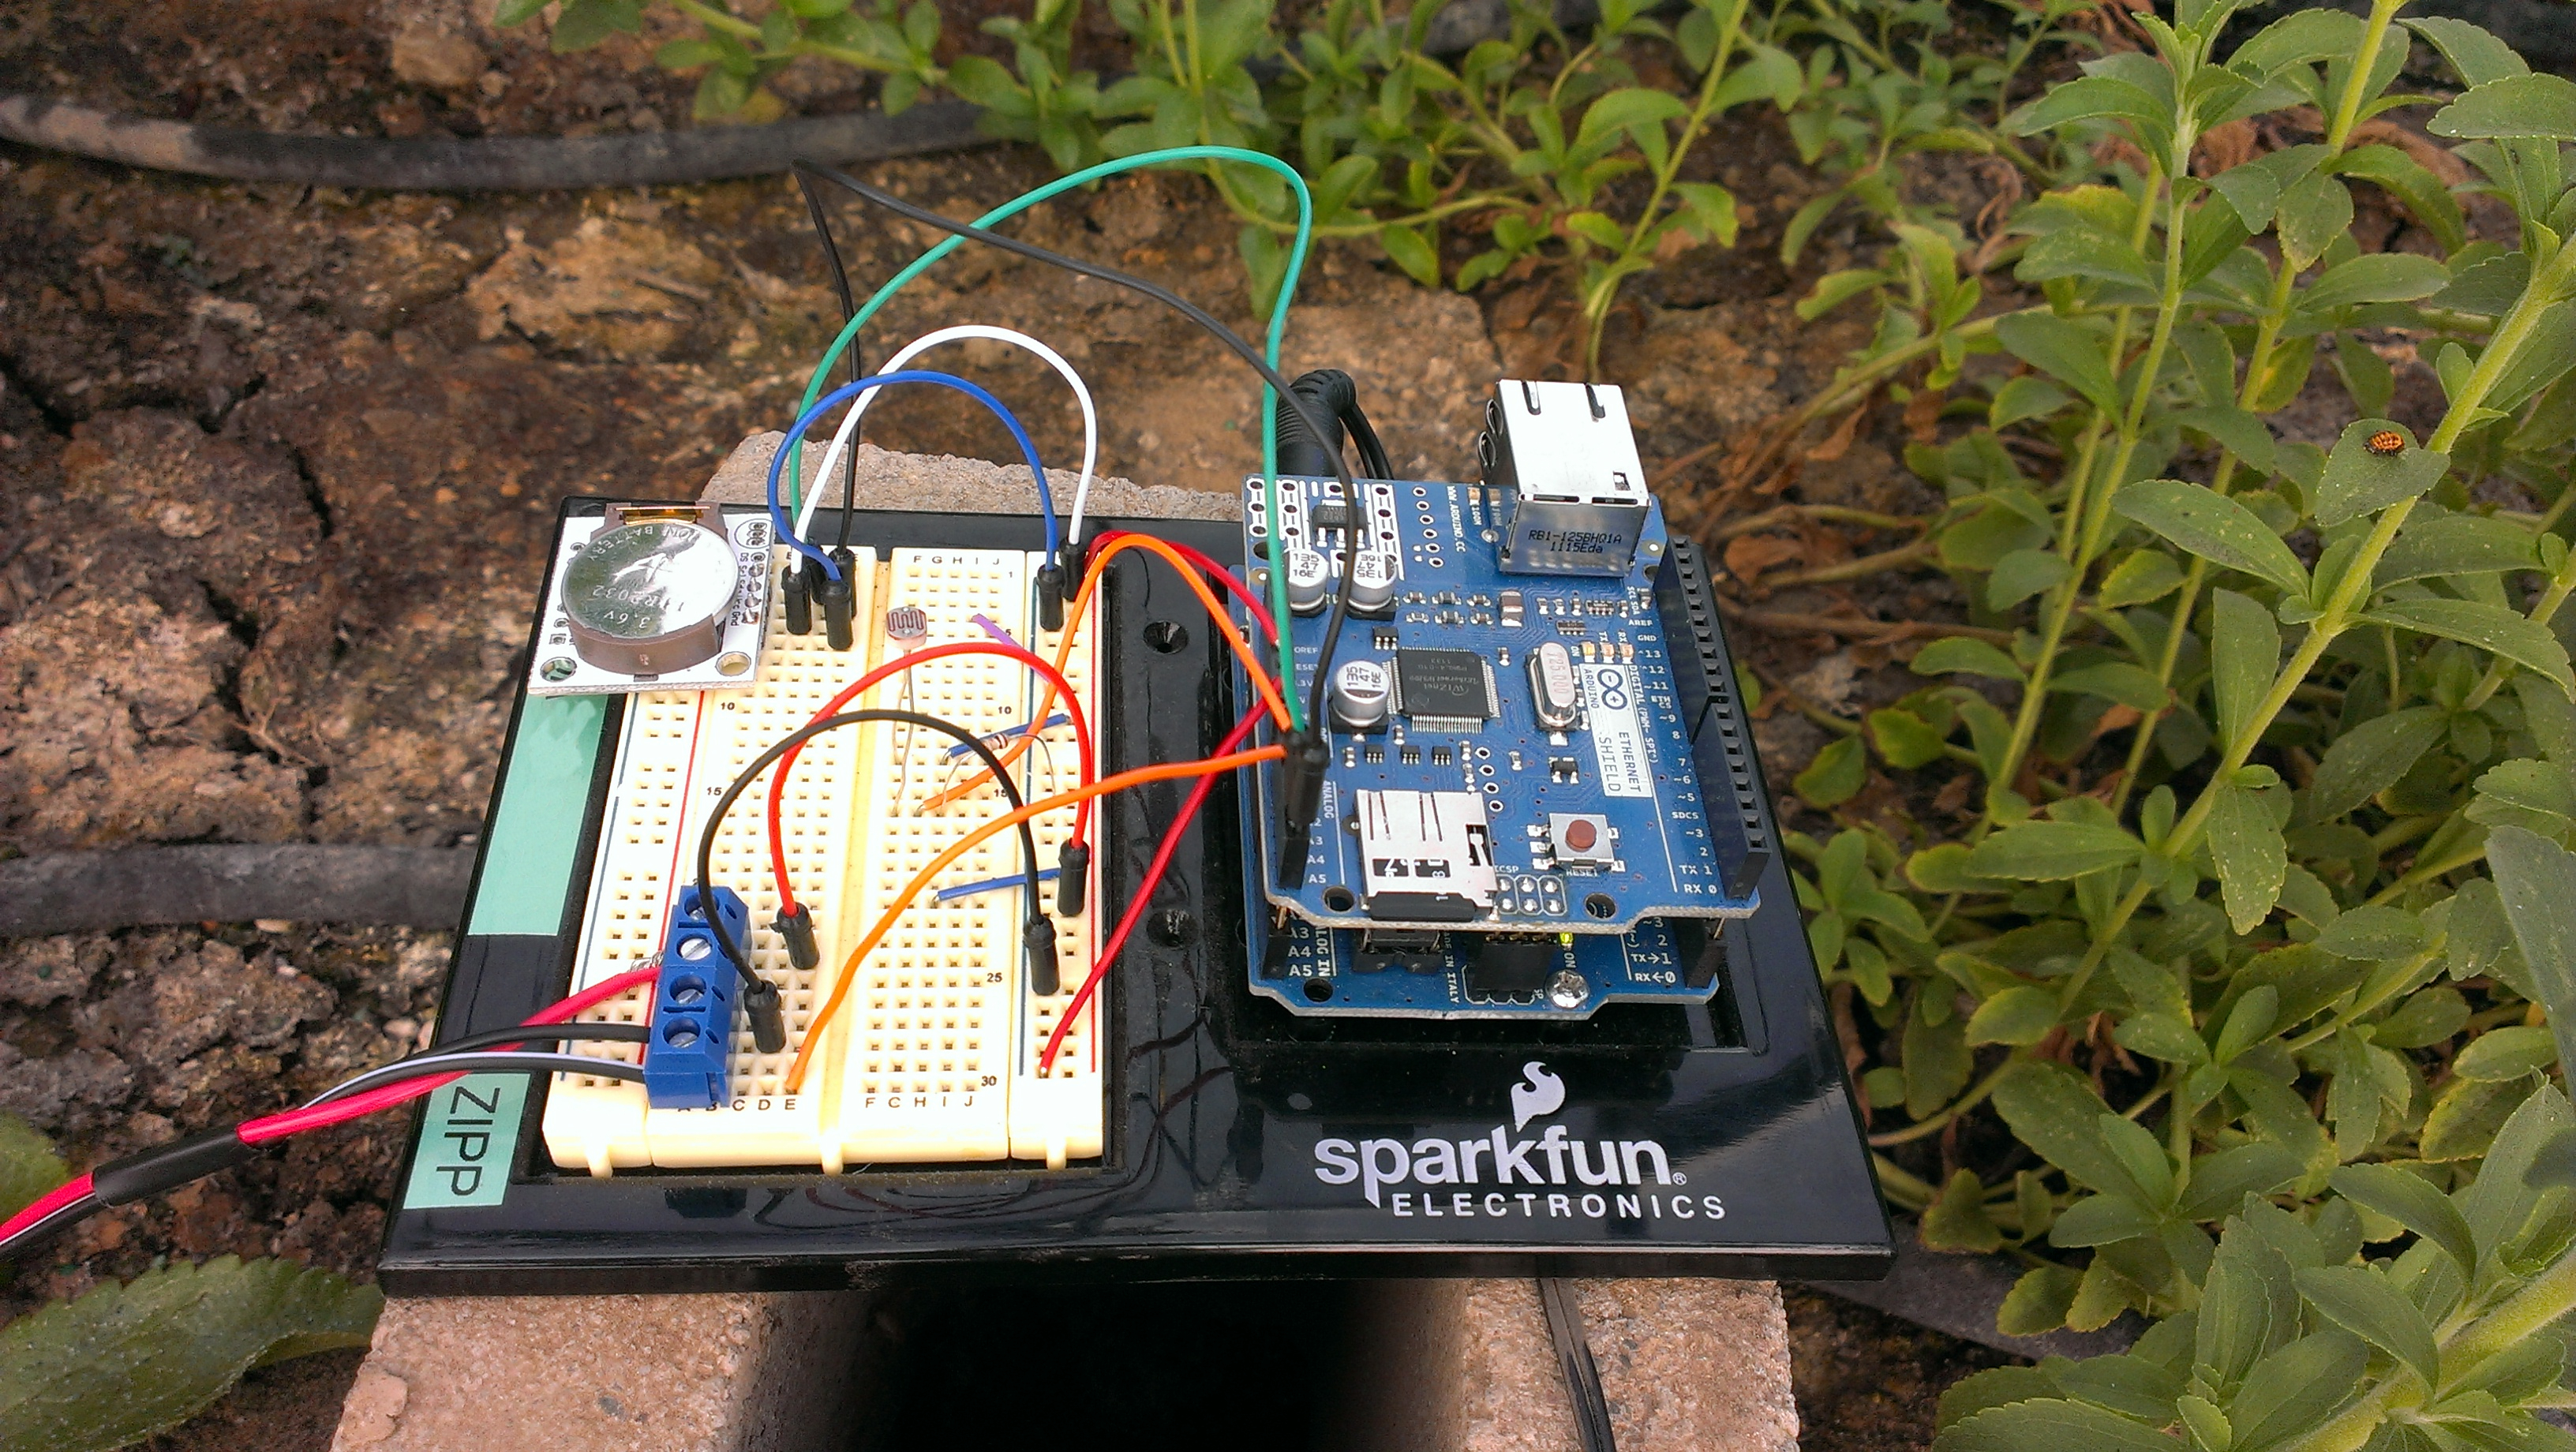
photoresistors via arduino to micro sd datalog
To make sure I was switching the lights at the correct time and duration, I used a different arduino to measure the light levels and datalog them to a micro SD card on an ethernet shield. Photoresistors, arduino, sd card. Boom.

Bioreactor datalogging and sending to the cloud
BioFlo 3000 arduino connection
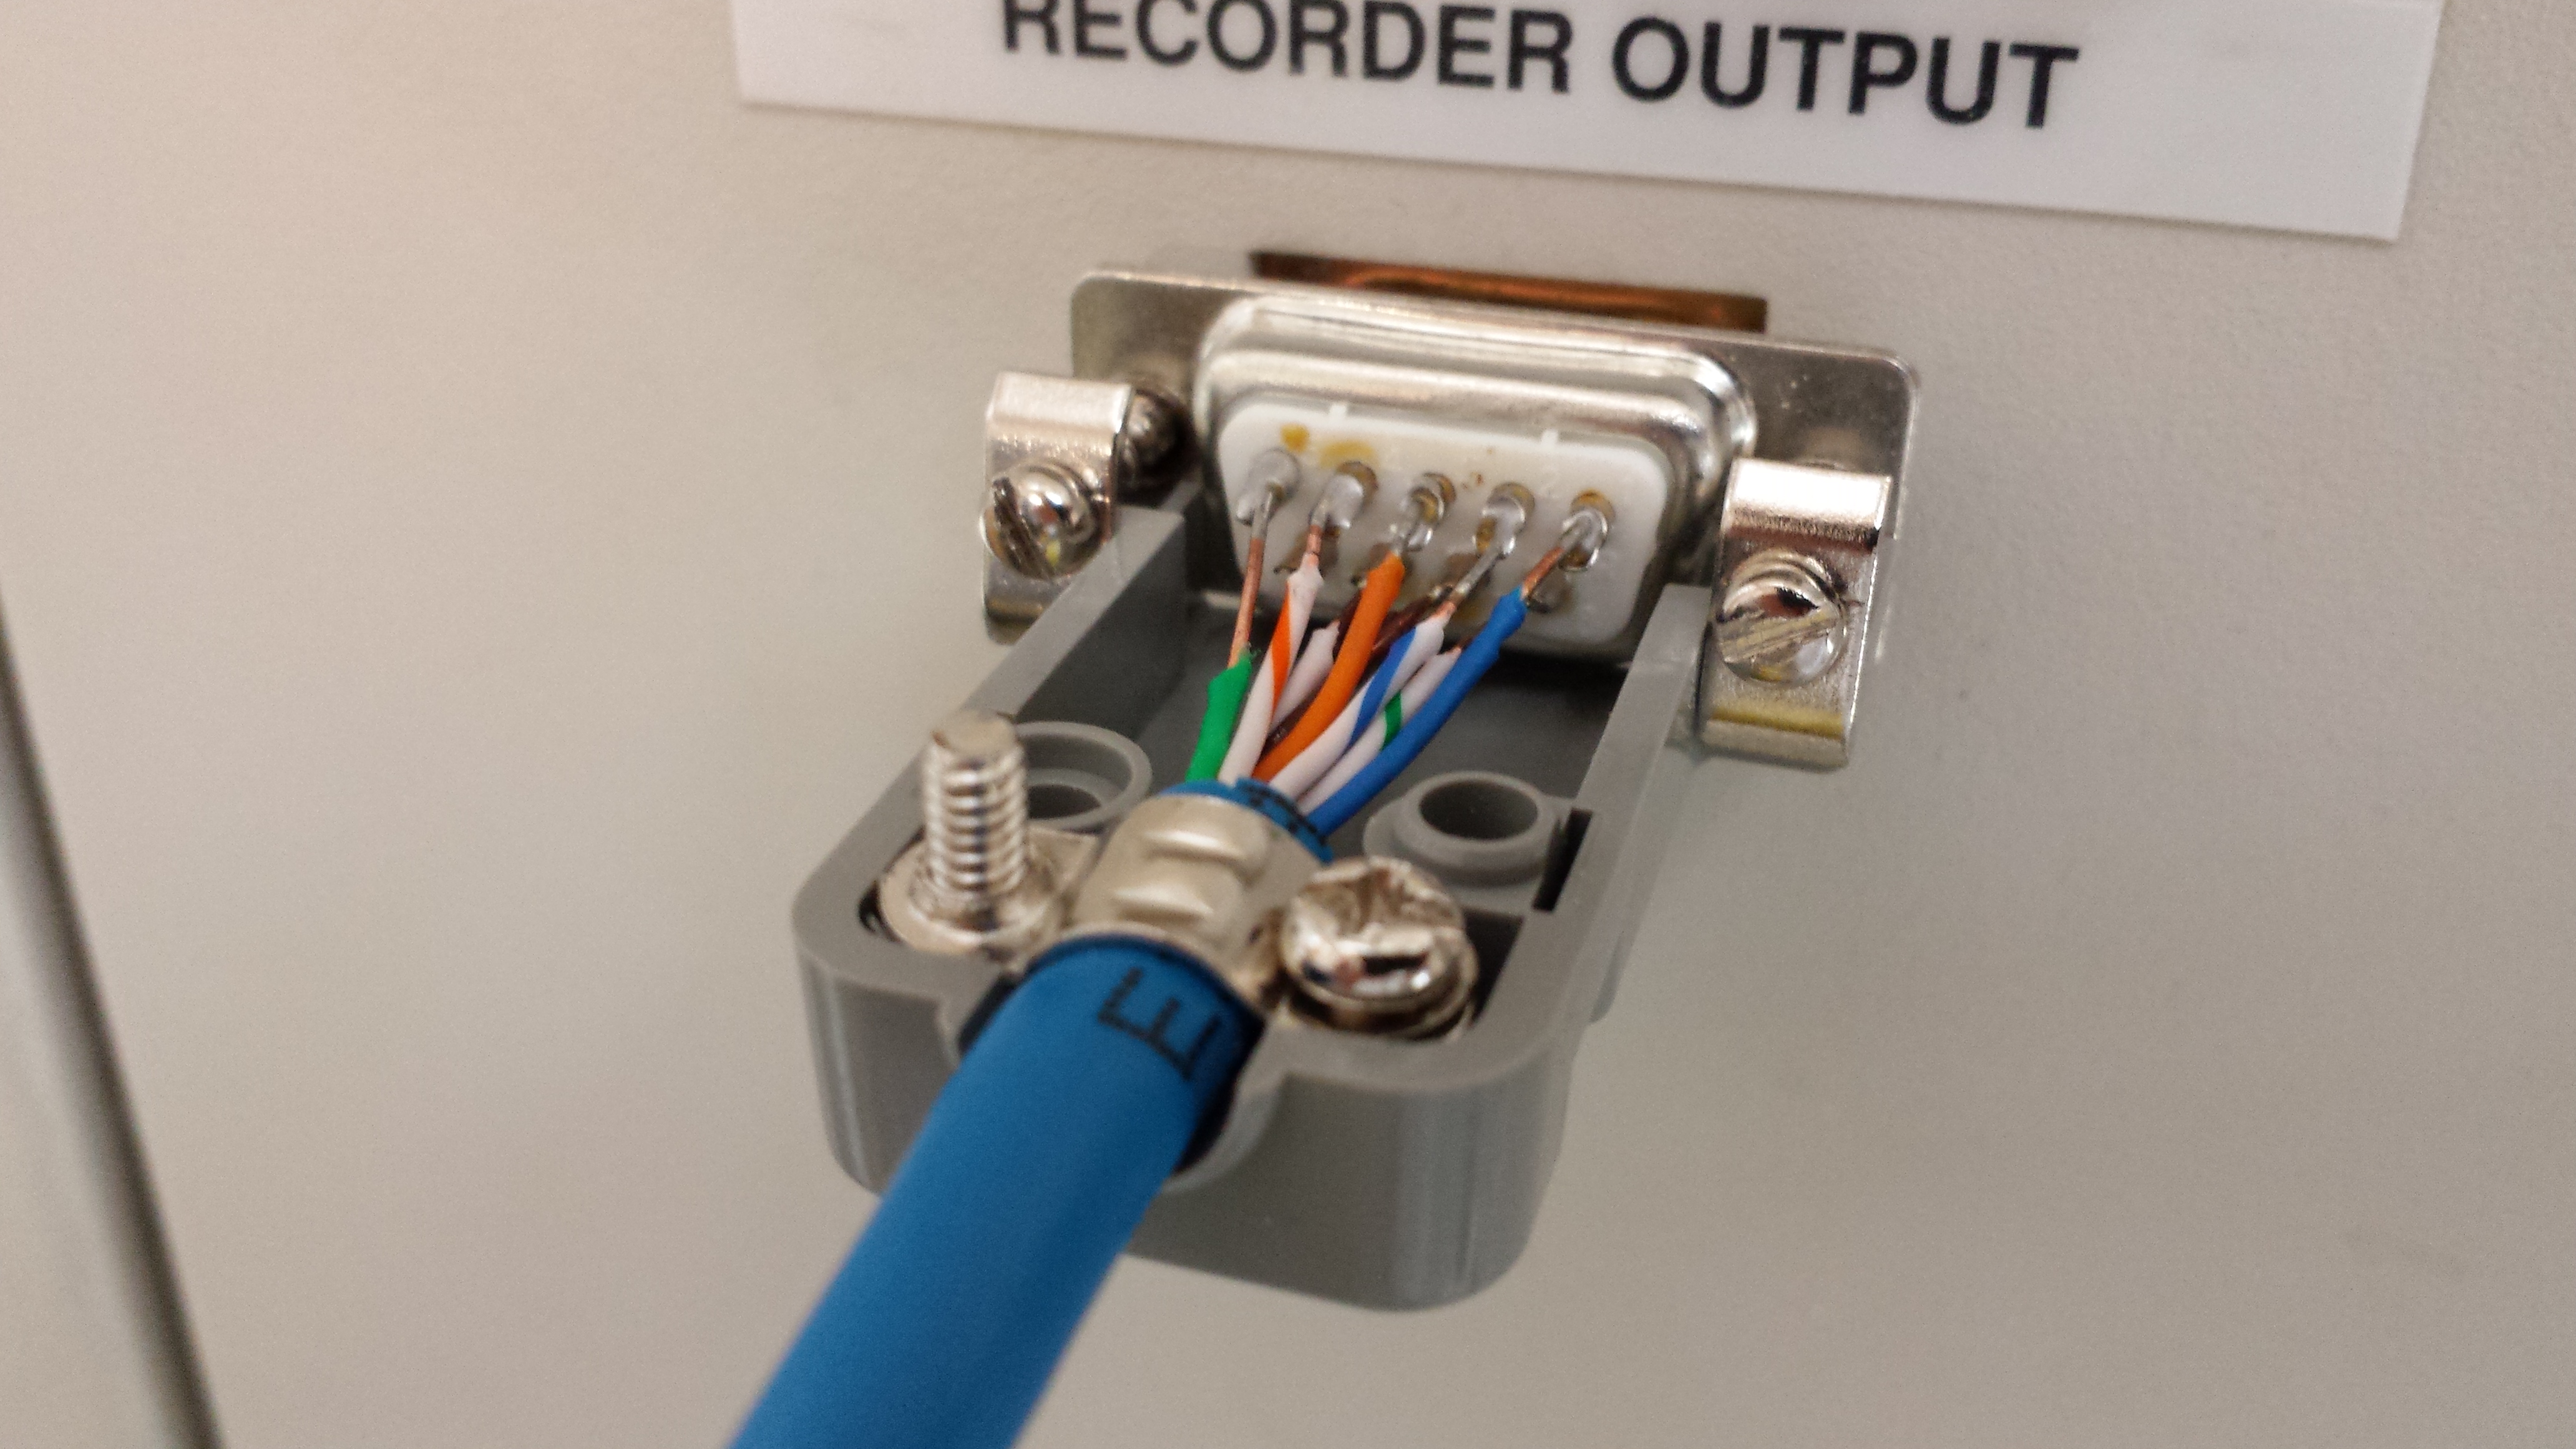
Old bioreactors are cheap and capable, but they’re not very digitally advanced. But the old data access ports can be tapped into for datalogging and triggering alarms through an arduino. This is a custom cable with Cat5 cable soldered to a 9 pin din connector to a New Brunswick BioFlo 3000 bioreactor. Different iterations had different capabilities, but pulling the data off the machine and either datalogging, or uploading the data to an M2X server, or email alerts were used for different experiments.

3D printed protein crystal structure models
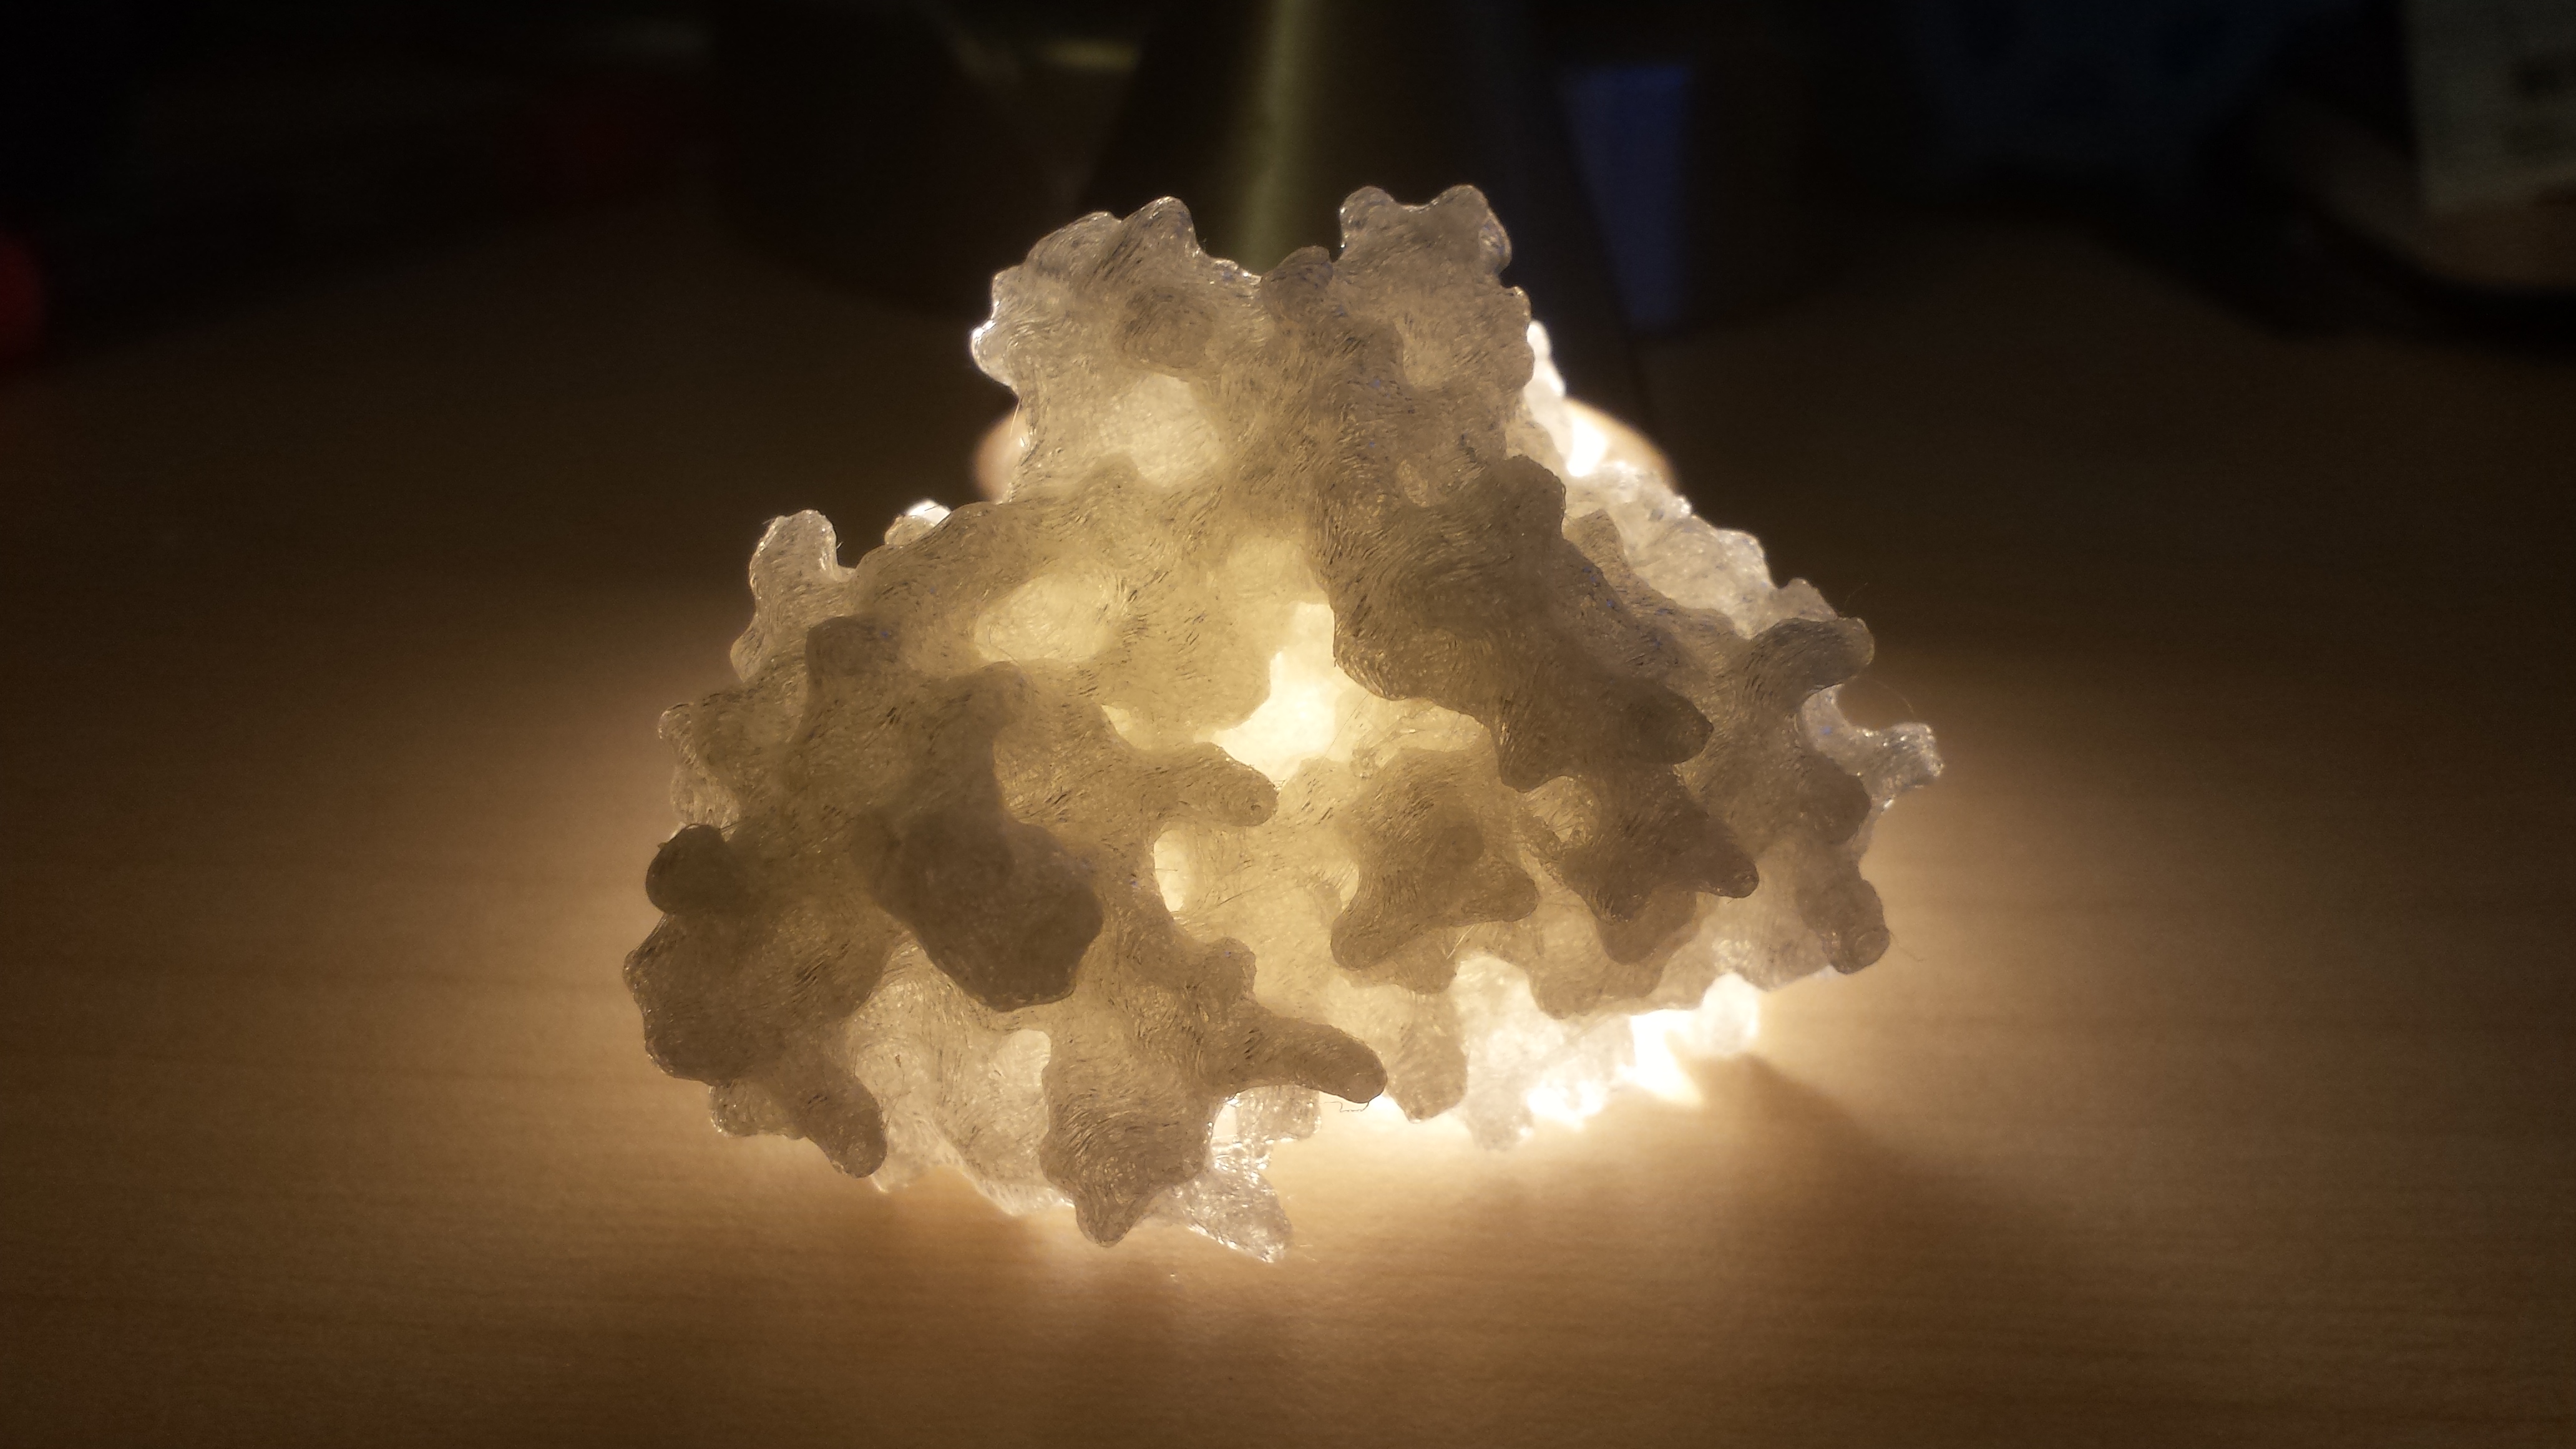
3D protein model crystal structure
I know it has been done before, but I had to include a picture of my 3D printed protein model. They are just too cool!

I’ll try to sit down one of these days and start to write things up, but if there is something you want more information about, email me or leave a message in the comments section!

-BZ

Flow cell spectrophotometer

Mini flowcell spec

While building a mini bioreactor I thought it would be cool to have a personal spectrophotometer to monitor the culture density over the life of the culture. I was inspired when I saw a product from Ibidi for doing live microscopy in an aseptic, optical grade flow cell with luer lock fittings on the inlet and outlet. Boom! A disposable flow cell solution for my mini spectrophotometer system. They are offered in different flow chamber thicknesses and even surface coatings for adherent cell growth, but for a yeast or bacterial culture I opted for the untreated or non-functionalized chamber.

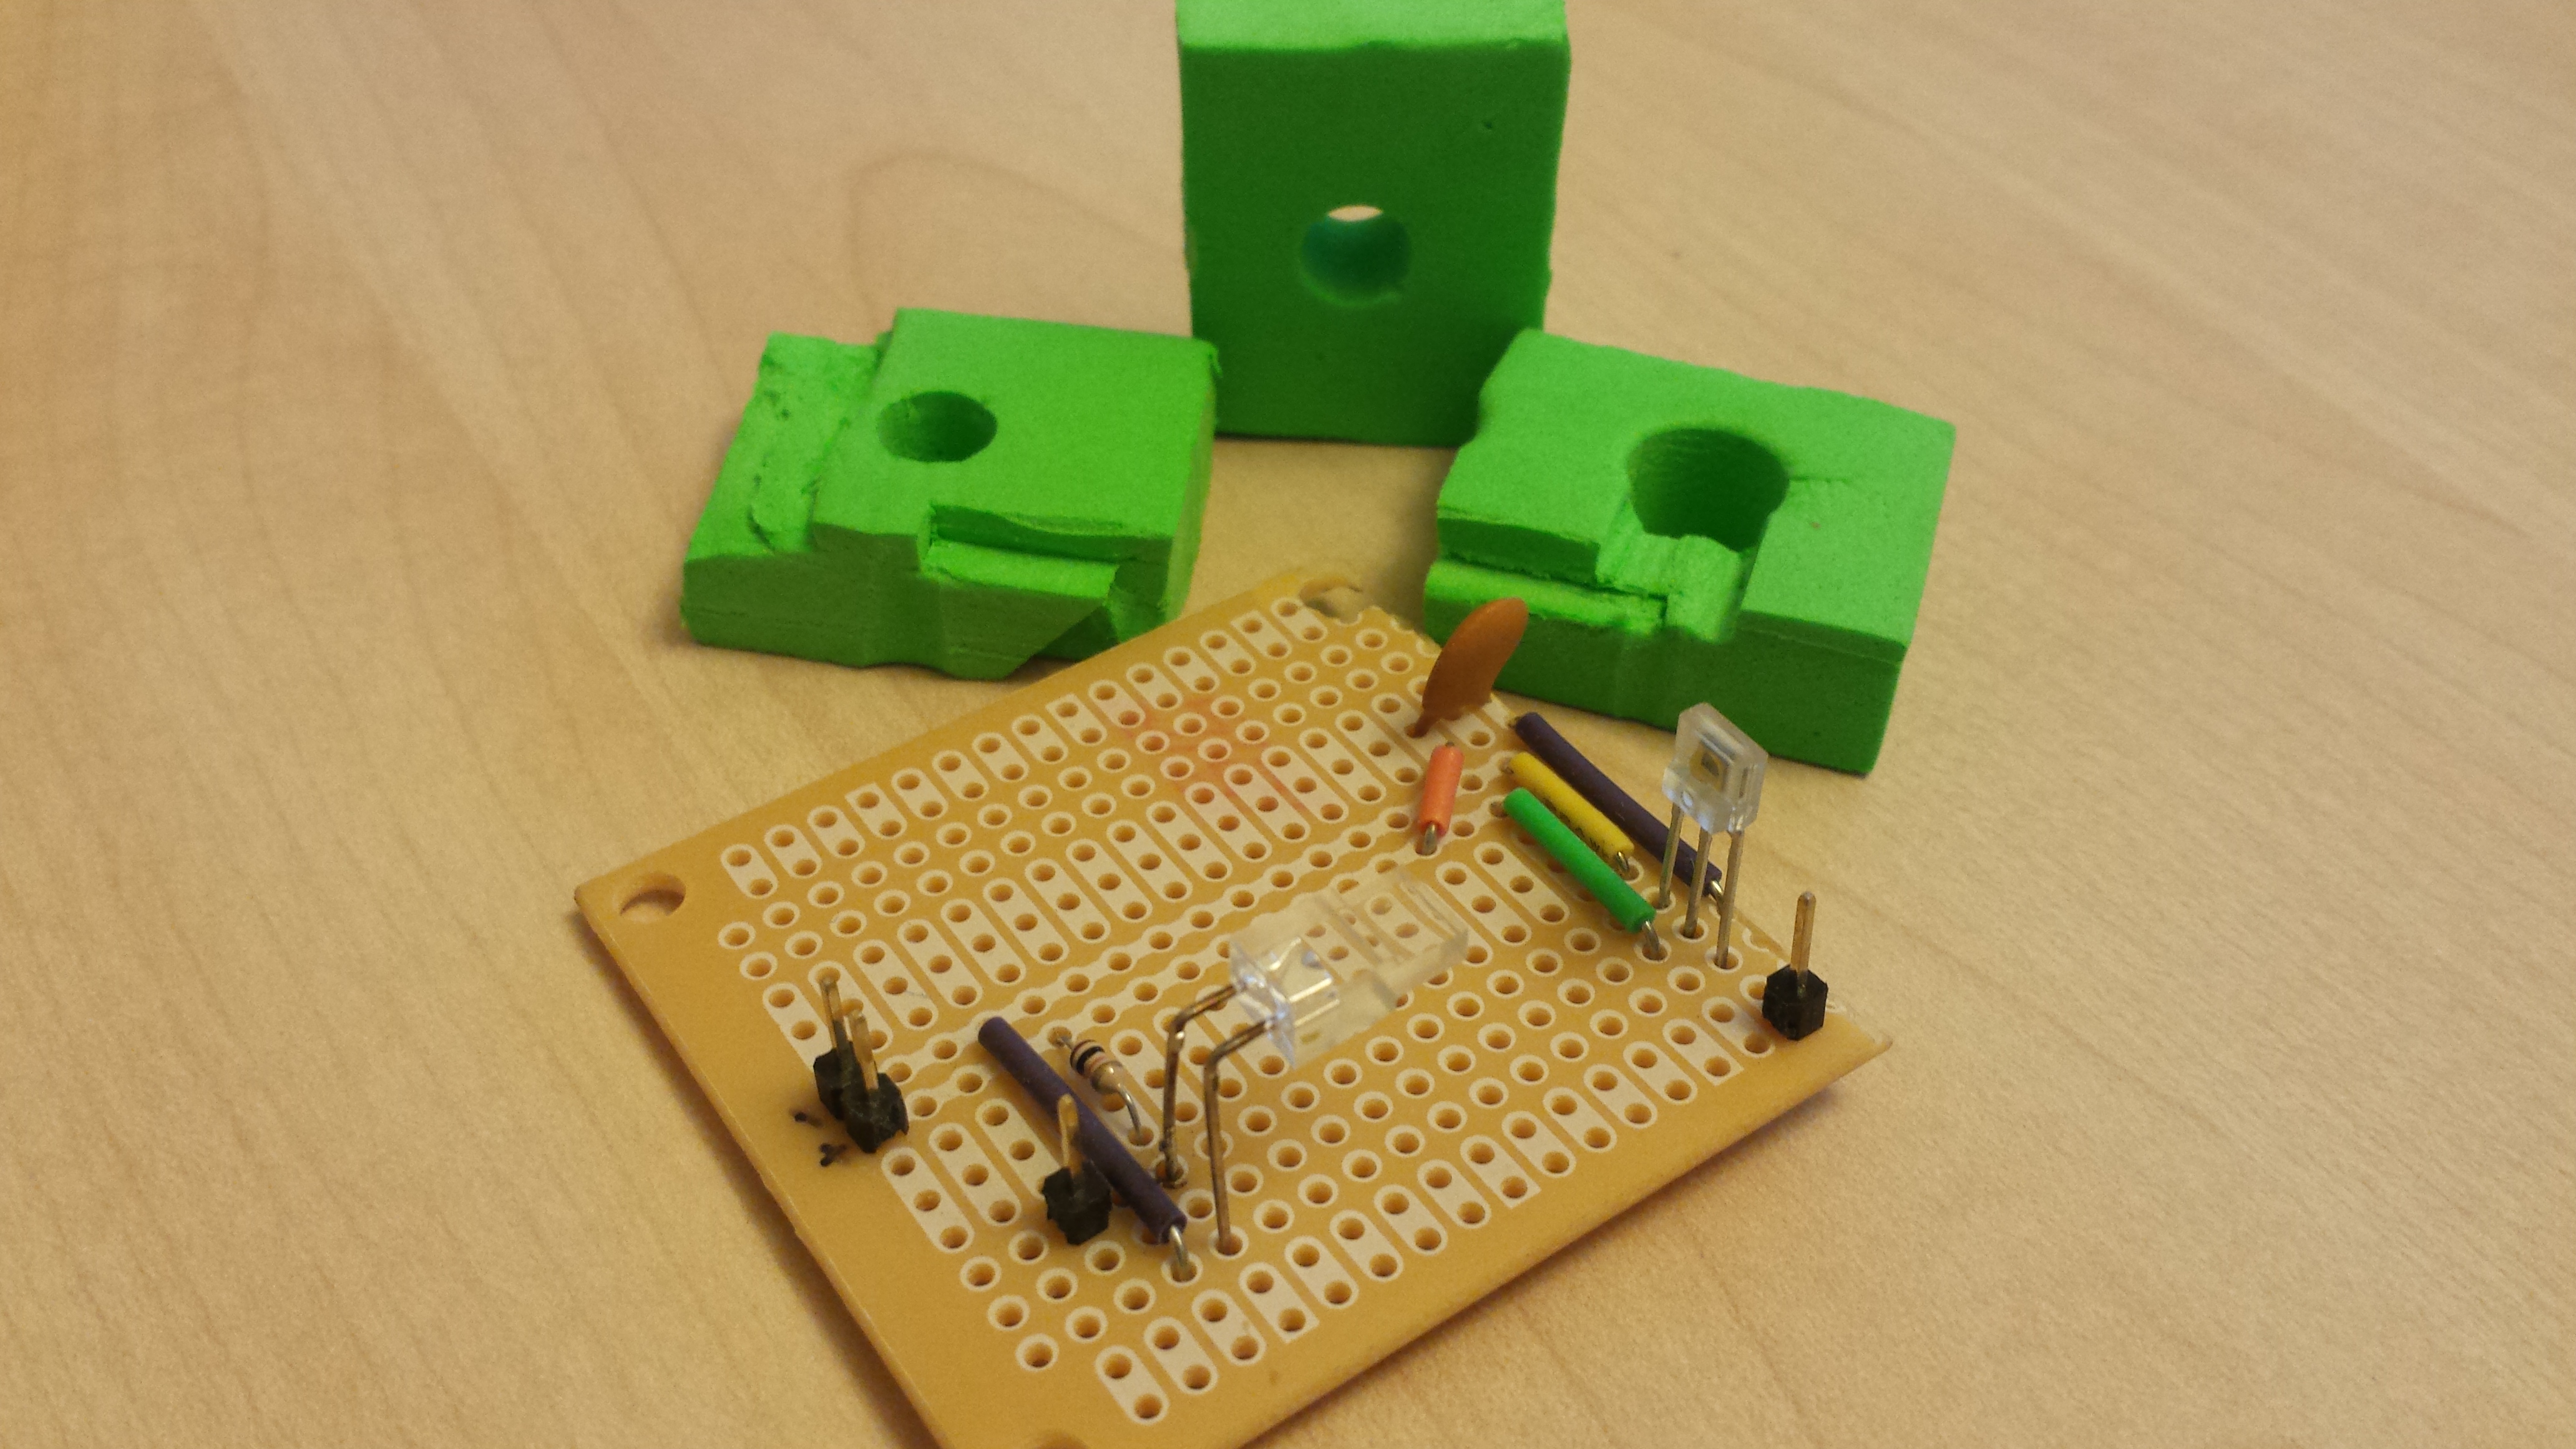
PCB board with LED and digital light detector
Link to full size image

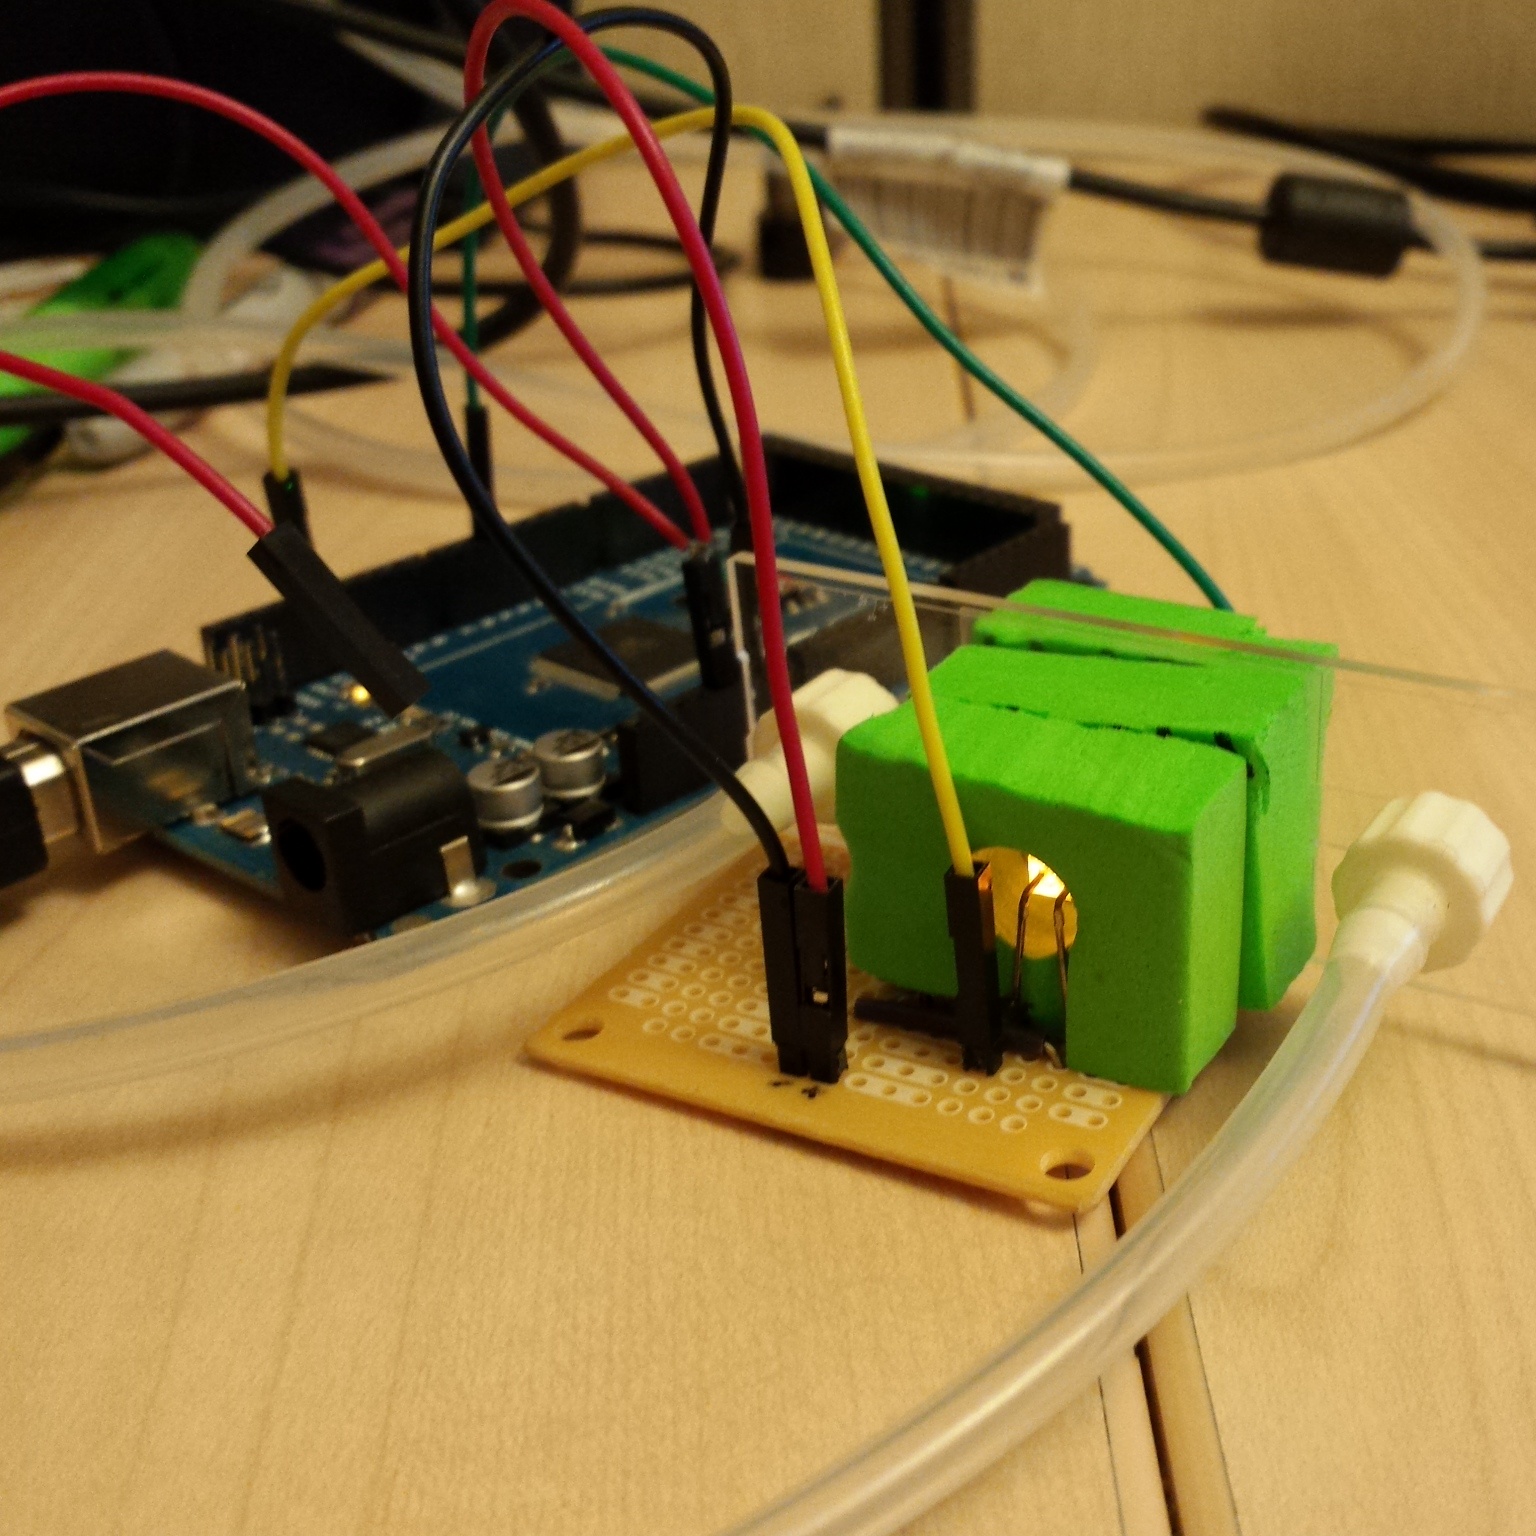
On a scrap pcb I rigged a light to frequency converter from sparkfun.com with a 0.1uF capacitor, powered by the 5v from an Arduino, and for the light source I used a LED that emits about 600nm light, and to cut down on background light I even cannabilized a goldbio.com floatie to act as the light chamber (I may have also won an award for it here). The code is pretty simple, turn on the LED, pump the culture through sterile peristaltic pump tubing and through the flowcell (pump activation time depends on the length and volume of tubing), measure the amount of light that is transmitted through the culture, compare the reading to known values, and pump the culture back into the spinflask or bioreactor. As nanodrop spectrophotometers exemplify, you don’t have to have a big cuvette with 1cm wavelength to take an A595 reading. Beer’s/Lambert’s law is dependent on the pathlength, so the math in the code depends on the chamber thickness of the ibidi slide. Or it is somewhat irrelevant because it will all be calibrated with known culture concentrations that have been measured with a true spectrophotometer.

Peristaltic pumps are pretty easy to come by (adafruit, ebay, etc). I love the availability and functionality of pharmacia P-series pumps, but I can’t get the full functionality that is suggested in the spec sheets. Through a 15pin din connector you should have the ability to engage the motor, change the flowrate, and even change the directionality of the pump head, but admittedly I can only get an arduino to turn them on and off. I need some more time to tinker with the communication, but I suspect it might require 5-20mA communication, as that seems to be the industry standard for PLC controlled instruments. On the open end of the peristaltic pump tubing beyond the slide/flowcell, I put a hydrophobic 0.45 micron sterile filter. The tubing can all be autoclaved with the reactor vessel, and then aseptically put on a sterile ibidi flowcell and place into the LED/sensor assembly.

I’ll dig through my backup drives to find the code, but I must have archived it a while back. For what it’s worth, I used the basic DS1307 real time clock code to keep time, used the TSL235R example code to pull the signal, sampled on a set interval, and then datalogged the values onto a micro SD card through an ethernet shield on an Arduino Uno. I was happy with how it turned out, and that GoldBio thought my alternative use of their floatie was pretty cool!

-BZ

Budget Molecular Biology Power Supply

For my first blog post I have chosen to write up a project I did very early in my startup days. The theme of this post is that biotech shouldn’t be so dang expensive.

While setting up a molecular biology lab for a startup biotech, I was shocked at the industry prices on equipment and reagents, something I took for granted while still in academia. Nowadays I am better at vetting Ebay sales for used equipment, but at the time I thought there were two options: new or homebrewed. So I made a simple 120v DC power supply to run SDS-PAGE gels for about $20 in parts. I think you could probably get the parts down to about $10 per power supply.

Disclaimer: I am a biochemist, and not an electrical engineer or someone who designs electronics for a living. Electricity hurts. This post is meant to be informative, but not fully instructional. Use this information with extreme caution, and don’t blame me if you shock yourself or catch something on fire!

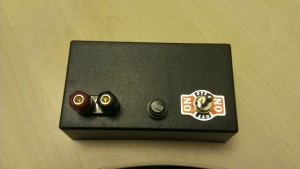
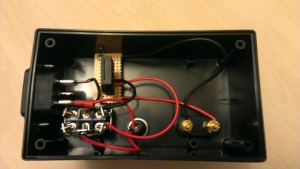
So it all started when I needed another power supply to run my SDS-PAGE protein gel system. I didn’t want to buy an expensive power supply because I just couldn’t justify spending hundreds of dollars for something I wasn’t going to use much. So in the early days I used alligator clips to tap into the leads from my BulldogBio DNA agarose gel box. This was pretty sketchy, so after a few runs I decided to open up the power supply and see what was inside. I saw only two switches, a fuse, and an electrical component that was new to me. After googling the writing on the module I learned that it was a Bridge Rectifier- basically a big rectifying diode setup that can convert the AC into a choppy DC supply. The Bulldog power supply obviously worked well for running gels, so I didn’t think that the rough DC signal was a problem. Inside the BulldogBio unit there was also a switch to switch the negative/ground to the electrophoresis rig between the true AC ground and the (-) leg of the bridge rectifier (I think this is how it switches from +60vDC to 120vDC), but I didn’t implement that in my power supply (yet). So I pieced together the parts, built the power supply and it worked!

IMAG1280
Link to fullsize image
IMAG1279
Link to fullsize image

Bill of materials:
Electronics enclosure of your choosing
120vAC Power Inlet (and a cord- or just run the cord into the box)
Double Pole Single Throw (DPDT) switch rated to >5A AC (I used a DPDT switch I had laying around)
Fuse holder and quick burn 1A fuse (you can get one built into the power inlet also)
Bridge Rectifier (I bought an overpriced one from Fry’s)
Banana Plug Terminal
A scrap piece of proto board that I had to drill out to fit the big terminals of the bridge rectifier
Some scrap 20ga wire and blade fittings
Solder and iron to connect to the fuse holder and power terminals
Heat shrink tubing to cover the naked power terminals (I didn’t, but I would next time)

Notes:
I definitely would not use this for sensitive electronic equipment, as the DC output is probably pretty rough. It would require some beefy capacitors and voltage regulators to fine tune the output, but that is way beyond my knowledge. The ability to switch between 60vDC and 120vDC would add on a couple of dollars, and would give me the ability to run a gel a little slower. This would likely only require a single pole-double throw switch to switch the gel negative pole between the true AC ground and the (-) leg of the bridge rectifier. But I haven’t gone that far, for what it’s worth.  Also, I haven’t really tested how much heat is generated by the bridge rectifier after an hour of use. The overall box stays cool, and all components look fine (read: no meltdowns yet). If you are running multiple gels or need to push more current through the rectifier, consider getting one with a heatsink, or at least use a fan to move some air through the box. Also, I haven’t really tested how much heat is generated by the bridge rectifier after an hour of use. The overall box stays cool, and all components look fine (read: no meltdowns yet). If you are running multiple gels or need to push a higher amperage, then definitely keep an eye on the box and component temperatures.

I’ll try to sketch out a schematic when I have a moment- or maybe a Fritzing diagram if I’m feeling saucy.

-BZ